TABLE OF CONTENTS
- 1. Recommend: Create an "Availability" template
- 2. Manage a scheduled event in Google calendar
- 3. Manage a Team Schedule as a Host
- Extra info:
- Manage a Team Schedule as an owner
- Manage a scheduled event in Zoom website
- Zoom desktop app calendar
- Zoom email
- Troubleshooting
For a video walk-through of Zoom Team Schedules, click here
After a user schedules a meeting with you, an event will be created in your calendar, and you'll receive an email from Zoom.
The calendar event is more useful than the email.
You can manage this event in the Google calendar, the Zoom desktop app calendar, or in the Zoom website.
The Google calendar is more useful than the Zoom app calendar.
1. Recommended: Create an "Availability" template
For a video walk-through of this, click here
In the Zoom "Scheduler" page, click "Settings" in upper-right, and select "Availability".
Under "Availability", you'll see a drop-down of any you've created, to select and edit.
Under "Active on", you can enable this on any Team Schedules.
In upper-right, click "Create Availability" and write a title
For example: enter the title "Unavailable", and un-check all days so there is no availability), then create another availability for specific weeks.
In lower menu, duplicate it or delete.
Enable an Availability:
Option 1: In Scheduler Settings, in "Availability" section, under "Active on", check the box for a team schedule.
Option 2: In the Team Schedule, go to #3 Availability, under "Choose Availability", select "Use existing availability", and below that click the drop-down and select it.
2. Manage a scheduled event in Google calendar
To edit, you select the event, and click the pencil icon at the top for "edit event".
To reschedule, you select and click "edit event", and click on the dates and times at the top, click save and choose to send update emails.
This won't be limited by your Team Schedule availability.
If students try to reschedule, you can accept in Gmail or Google calendar.
Gmail: You'll receive an email "Proposed new time". The "Accept" button is at the top, below the When/Where/Who info.
Google calendar: The event will appear with a clock icon. Select it, and under the 'Guests' info you can click "Review proposed time". Click "Save" at top to accept. 'Find a time' that shows all user public calendar events, it's to the right of 'event details'.
To cancel, you select the event and scroll down to "Need to make changes to this event?"
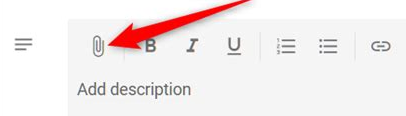
To attach files, you select and click "edit event", scroll down to the text box for 'add description or attachments', and click the attachment button (see screenshot), and select "Upload".
When clicking save, you'll see "Would you like to send update emails to existing Google Calendar guests?".
If you click "Send", you can also write an optional message.
If you click "Don't Send", student's won't be aware of the attachment unless they select the calendar event and scroll down to the bottom.
To change owner and transfer the event to a different host, this isn't possible.
Google calendar will let you do it, but Zoom won't let the other host start the meeting.
3. Manage a Team Schedule as a Host
In Zoom website, click "Scheduler" in left sidebar (for first time, click "Get Started"). If you're added to a Team Schedule, it will appear under "My Schedules".
To set your availability, click the gear icon in upper-right of Team Schedule for "More actions", and select "Edit." On the left sidebar, go to #3 Availability.
Under "Availability" at the top, it should say "Set different hours per host".
Click on your name, and under "Choose Availability" it should say "Set custom hours".
Below this, you can check days of the week, click on the start and stop times to edit, and click + to the right to add multiple time periods.
To set this availability for a specific week, we recommend that you set no availability during all weeks, then change this on that specific week. A convenient way is to use templates (in Zoom, this is called an 'Availability'.).
For example, you will host Office Hours only during week 3, so you create a template for Week 3, and you create another template for "unavailable".
Before and after Week 3, enable the template for "unavailable".
During Week 3, change this to enable the template you created for Week 3.
Extra info:
Manage a Team Schedule as an owner
To set the distribution, click the gear icon in upper-right of Schedule for "More actions", and select "Edit." On the left sidebar, go to #2 Hosts.
"Distribution" is set by default to "distribute schedules to hosts evenly". Click on this the drop-down to see options with descriptions.
The 'even' distribution means that if host availability overlaps, events will be assigned to hosts in a balanced way.
The 'by priority' distribution means that hosts can be set a priority (ranked 1-4), and if host availability overlaps, then more events get scheduled to hosts with higher priority
To restrict the hosts' ability to edit, click the gear icon in upper-right of Team Schedule for "More actions", and select "Edit hosts".
To add questions that students answer while booking, click the gear icon in upper-right of Schedule for "More actions", and select "Edit." On the left sidebar, go to #5 More Options". Under "Attendee questions", click "Add a question".
To change the question type, to the right of "Enter your question" click on the drop-down menu. "Lines" questions are short-answer. "Choice" questions are multiple-choice.
Manage a scheduled event in Zoom website
Click "Scheduler" in left sidebar, and click "Scheduled events' in upper menu.
Each entry shows the date/time, with the title shown as "Team schedule name (Name written by student)".
To the left, click the the arrow to expand details.
Zoom link is shown here.
Date/time and user info is shown below.
In bottom-right, click "Details" to expand the user info and email address.
"Mark as no-show" can be clicked here, for Previous meetings (students do not get notified if you do this).
"Attendee Questions" are shown here.
To the right, you can Reschedule, Cancel, or Export to csv file. We recommend that you cancel or reschedule from the Google calendar event.
Rescheduling in Zoom website does not notify students, and is limited to within your availability (based on Team Schedule settings).
For you, rescheduling will change the event in your calendar and send you an email from Zoom.
For students, they won't receive an email or see their calendar event change.
Cancelling will update the student's calendar event, but they won't receive an email.
It will remain in the calendar, but shown as cancelled.
If you cancel from Google calendar, the event disappears from view.
Zoom desktop app calendar
For Zoom's guide to the calendar, click here.
The Zoom desktop app calendar is linked to your Google calendar. Events can be managed in either location, but Google calendar has more options than the Zoom app.
For example, attachments are easier to manage in Google Calendar. It's not possible to remove it or add multiple attachments in the Zoom app calendar.
Zoom email
An email confirmation from Zoom will be sent to you. The email title will say:
Booked: "Name of Team Schedule" | "Name of user" - "Day, Date, Time"
This Zoom email has the info to join, and at the bottom it shows any "Attendee Questions" if they're enabled in the Team Schedule.
For example, when students are booking, if they're asked to write the topics to be discussed, it will be included here.
You can't reply to this email to communicate with the student, since this is sent by a 'no-reply' address from Zoom.
Troubleshooting
If users incorrectly write their email address while booking, the event will still be created.
The user won't be able to join, as they won't receive an email confirmation or calendar event.
Select the event in calendar, and under "Guests" you'll see a blank profile icon next to the incorrect email address.
If students incorrectly write their name, but enter the right email address, the event will be created with no issues.
TABLE OF CONTENTS